Notebook generation
This module contains the scripts and API to auto-generate or update a documentation notebook skeleton from a fastai module (e.g. - fastai.) or existing documentation file (e.g. - docs_src/.ipynb). It is not expected you'd use this skeleton as your final docs - you should add markdown, examples, etc to it. The skeleton just has a minimal list of exported symbols.
tools/build-docs contains a command line tool that transforms a given module into a notebook skeleton. It's essentially a wrapper around gen_notebooks.update_notebooks. For usage around the command line tool, please follow instructions at gen_doc_main#updating-notebooks.
Alternatively, you can access the same functionality through the module API, documented below.
Important note: The notebooks automatically generated or updated need to be trusted before you can see the results in the output cells. To trust a notebook, click on File, then Trust notebook.
This module also contains the scripts and API to convert the documentation notebooks into HTML, which is the format used for the final documentation site.
Installation
This package requires:
- nbconvert: conda install nbconvert
- nb_extensions: conda install -c conda-forge jupyter_contrib_nbextensions
Once nbextensions is installed, your home page of Jupyter Notebook will look like this:
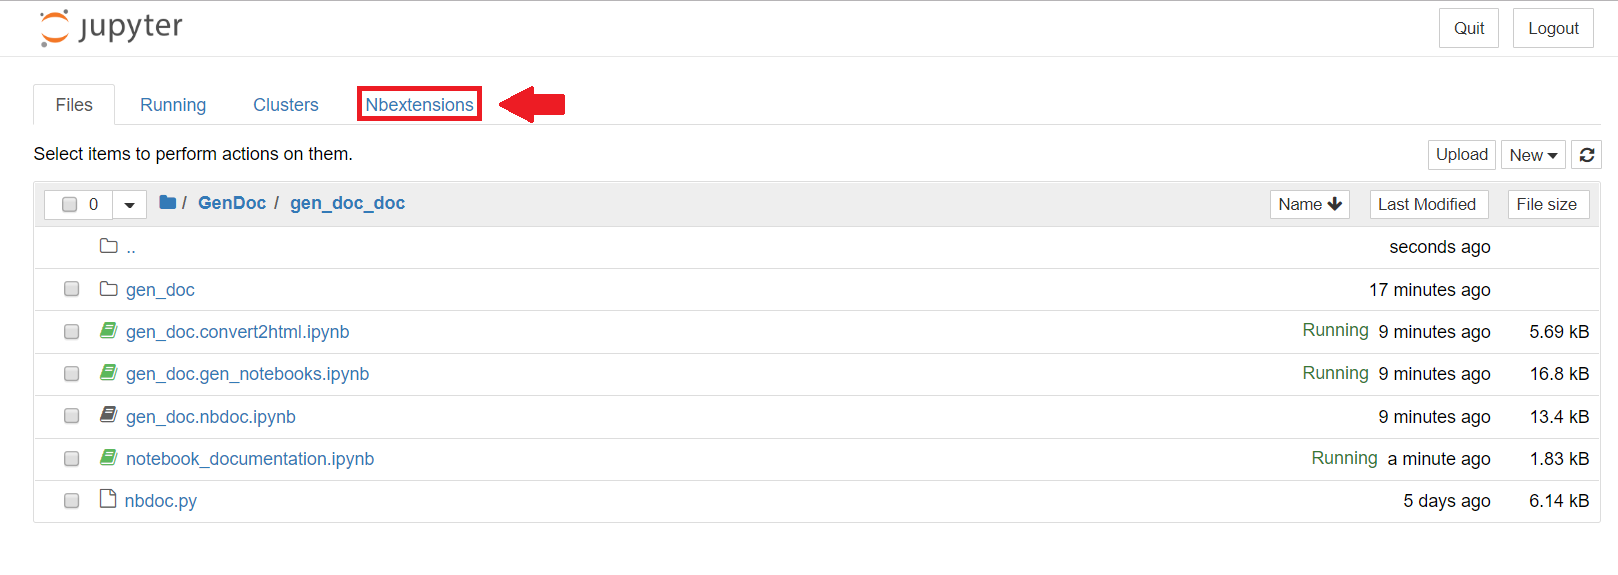
Click on the Nbextensions tab then make sure the hide inputs extension is activated:
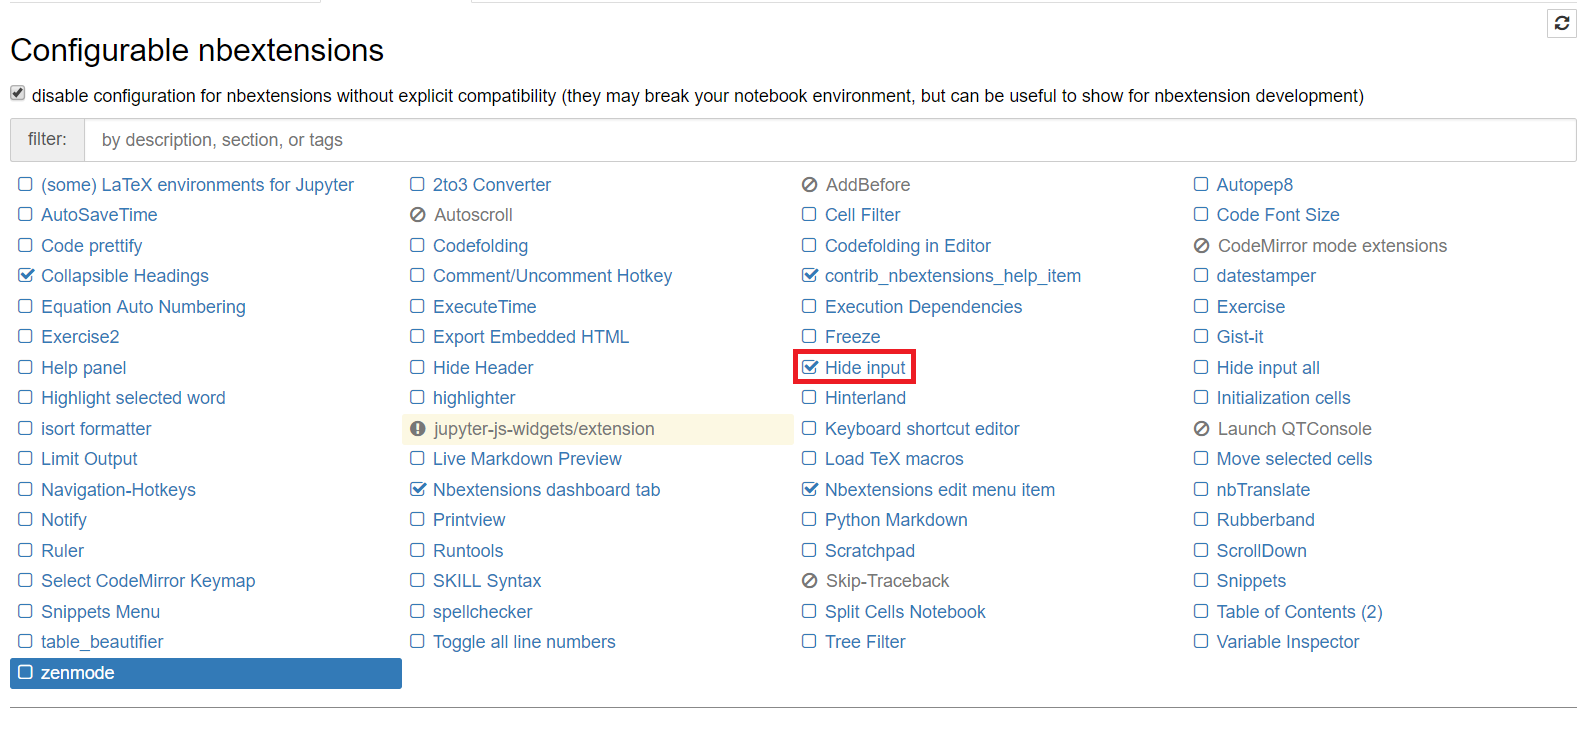
As its name suggests, this will allow you to hide input cells and only show their results.
There is also the Hide Input all extension, but don't use it, since it toggles all inputs on/off and once executed it'll be very difficult to restore the notebook to its original state where some inputs are supposed to be hidden and some are not.
Convert modules into notebook skeleton
The first (optional) step is to create a notebook "skeleton" - i.e. a notebook containing all the classes, methods, functions, and other symbols you wish to document. You can create this manually if you prefer, however using the automatic approach can save you some time and ensure you don't miss anything.
For the initial skeleton, use create_module_page, which creates a new module from scratch. To update it later with any newly-added symbols, use update_module_page.
Equivalent CLI:
tools/build-docs fastai.subpackage.module
All the cells added by a user are conserved, only the cells of new symbols (aka that weren't documented before) will be inserted at the end. You can then move them to wherever you like in the notebook. For instance, to update this module's documentation, simply run:
update_module_page(gen_doc.gen_notebooks, '.')You can also generate and update all modules in a package using update_notebooks.
Equivalent CLI:
tools/build-docs docs_src/gen_doc.gen_notebooks.ipynb
Updating module metadata
Jekyll pulls the documentation title, summary, and keywords from the metadata of each notebook.
Notebook metadata structure looks like this: 'metadata': { 'jekyll': {...} }
To update metadata of these notebooks, run generate_missing_metadata('.'). Then open the notebook jekyll_metadata.ipynb to change the metadata.
Updating all module docs
As a convenience method, this can update all notebooks. This snippet does the whole lot for you:
update_notebooks('docs_src', update_html=False, update_nb=True):
This will update all ipynb documentation notebooks specified under source_path
Add documentation
The automatically generated module will only contain the table of contents and the doc string of the functions and classes in your module (or the ones you picked with __all__). You should add more prose to them in markdown cells, or examples of uses inside the notebook.
At any time, if you don't want the input of a code cell to figure in the final result, you can use the little button in your tool bar to hide it.
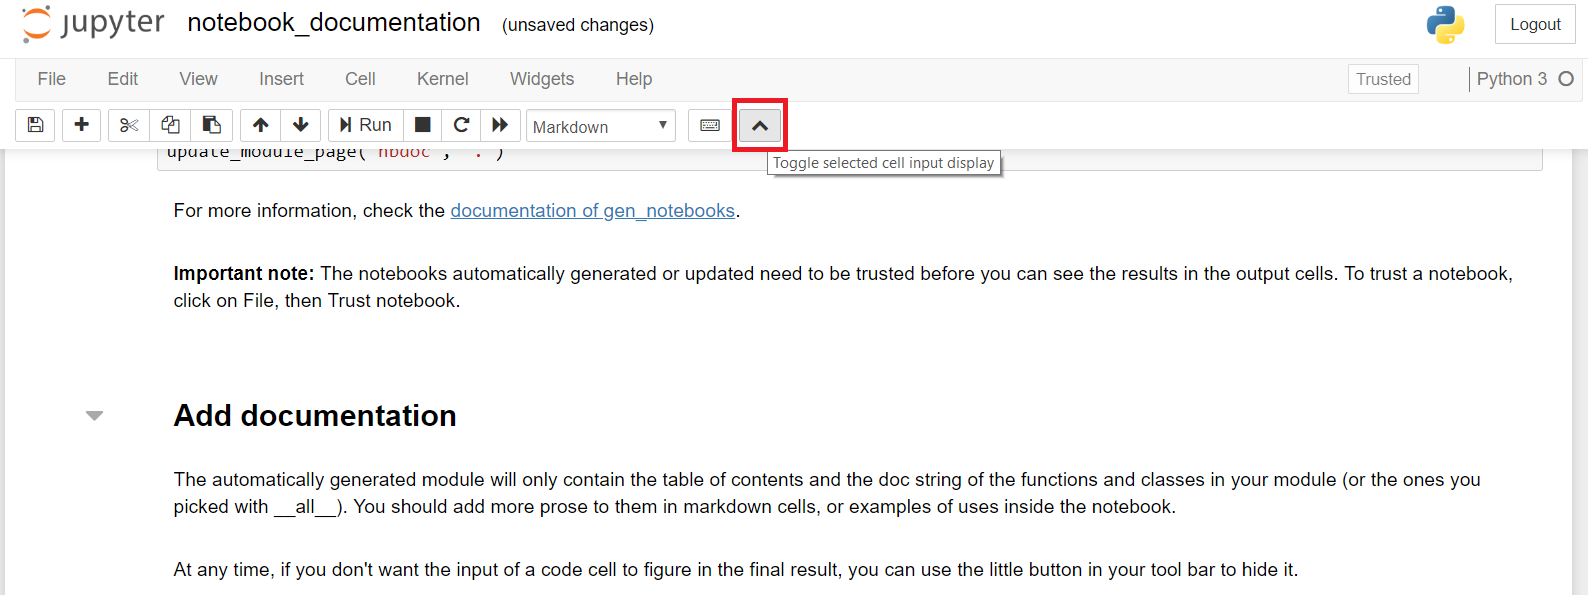
The same button can show you the hidden input from a cell. This used in conjunction with the helper functions from nbdoc should allow you to easily add any content you need.
Convert notebook to html
Once you're finished, don't forget to properly save your notebook, then you can either convert all the notebooks together with the script:
python -m convert2html dir- dir is the directory where all your notebooks are stored.
If you prefer to do this in a notebook, you can simply type:
from fastai.gen_doc.convert2html import convert_nb
convert_nb('gen_doc.gen_notebooks.ipynb', '../docs')
For more information see the documentation of convert2html.